It is not always a simple task to install laminate flooring in a r.v. with slide outs. Some flooring may require trimming or leveling before installation so be sure to follow the directions carefully. When using the instructions for your specific type of flooring, you should never leave them out of the vehicle as they can become lost.
In many R.V. trailers there are often spaces available that cannot be used for traditional hardwood flooring. Using one of the methods to install laminate flooring in a r.v. with slide outs is the best way to ensure you have enough room for the flooring, once it is installed. The flooring will be permanently affixed to the frame of the RV. This eliminates the need to cut and mark the flooring before installation.
In some cases, it is not feasible to use a professional installer to install laminate flooring in a r.v. with slide outs. If this is the case with you then it is possible to install the flooring on your own. If you decide to do so, be sure to purchase the appropriate tools and a little time to give yourself the needed help. If you are unsure of how to perform the required tasks then a professional installer is your best option.
To install laminate flooring in a r.v. with slide outs, you will first need to locate the rear of the RV. An access hole in the floor about two feet ahead of the largest wall is best. You will also want to drill pilot holes in the floor and ceiling to provide for installation of the planks. Be sure that the holes you drill are well above the surface level of the flooring. This will keep water from collecting in the planks and cause them to rot.
Next, remove the flooring panels that you are going to install. A hammer will be needed to remove the first few planks. Then remove the remaining planks until you have about one-third of the way down the floor. Remove any tack strips that are located beneath the planks and then install the laminate flooring panels one at a time.
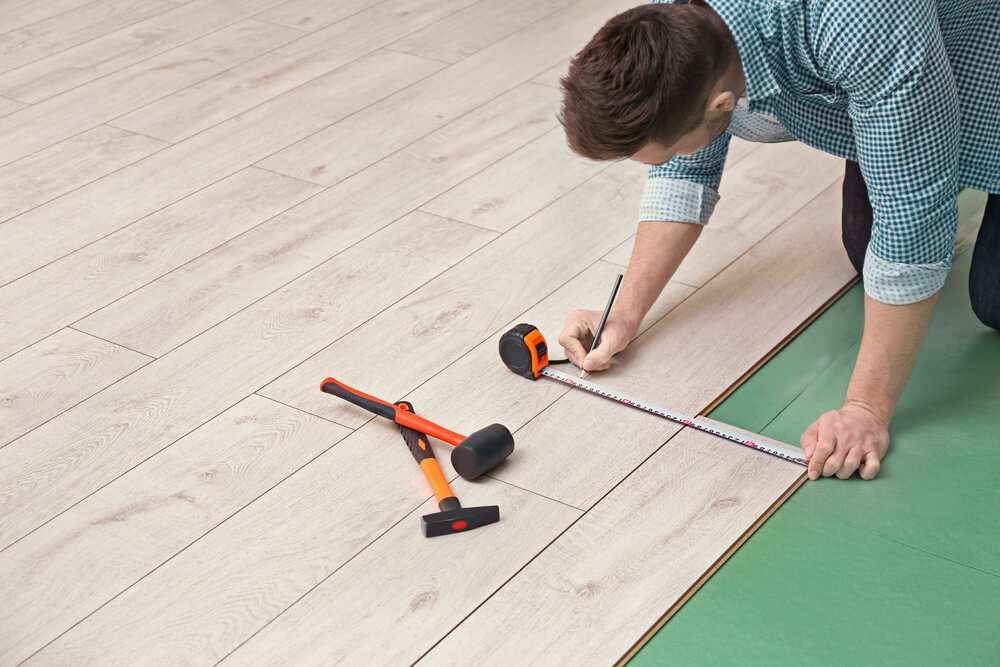
To install laminate flooring in a r.v. with slip out planks you will need to measure the planks to determine how deep they need to be. Most manufacturers recommend that the planks are cut about six inches deeper than the floor surface. The reason for this is that the planks can be installed closer together. However, if you have a longer wall than the depth of the plywood you will need to cut the planks deeper. Also, if your RV has carpeting rather than wood panels, you will have to measure the depth of the planks before you measure the plywood to install the flooring.
Once you have your measurements, you can begin to install the planks. Start by installing each plank, one at a time, using the long screws that come with the planks. Lay the plywood on top of the planks and secure it with the long screws. Then install the first panel and then continue to the next until all the flooring is installed. You may need to repeat some sections if you run into problems.
If you want to learn how to install laminate flooring in a r.v. with slide outs, you can find additional help on the Internet. There are websites that sell prefabricated floors that have been created specifically for R.V. use. These are easy to install and you will be able to customize your new floor with an interlocking design so that it is easier to take care of.